- Home
- Blog
- Deploy PHP apps with Database in Heroku within 15 minutes
Project ideas
Deploy PHP apps with Database in Heroku within 15 minutes
Have you created a Web application in PHP and looking to deploy in Heroku? Then you have come to the right place! Let us look how you can deploy PHP applications in Heroku within 15 minutes.
Why choose Heroku?
Heroku is a cloud service platform whose popularity has grown in recent years. Heroku is so easy to use that it’s a top choice for many development projects.
With a special focus on supporting customer-focused apps, it enables simple application development and deployment. Since the Heroku platform manages hardware and servers, businesses that use Heroku are able to focus on perfecting their apps. And not the infrastructure that supports them.
More time goes towards ensuring that users receive the highest quality experiences as possible.
Projects created in Heroku are bound to repositories in GitHub. Heroku’s integration with GitHub provides automated builds and deploys of the latest version of code.
GitHub is a trusted repository of source code, so Heroku’s integration with GitHub and other tools helps developers optimize their efforts and save stakeholders time and money over the course of development projects.
Deploying PHP Applications in Heroku:
Even though PHP is not as trending as other languages like JavaScript and Python, it still remains as a go-to language for hobby projects. What's keeping PHP alive is that it powers 80% of the websites on the internet. It is an absolute giant. Not to forget Facebook, Yahoo, Wikipedia, Wordpress and more are built using PHP.
I don't think we need any more introduction for PHP since you have already built a PHP application if you're reading this article.
Let us deploy your PHP application to Heroku
Prerequisites:
• A Heroku account.
• A Github account.
• XAMPP
• MySQL Workbench
• A Credit card (No money would be charged)
• Nothing else!
1. Create a new app instance in Heroku
If you haven't created a Heroku account already, go to Heroku’s sign up page and create an account.
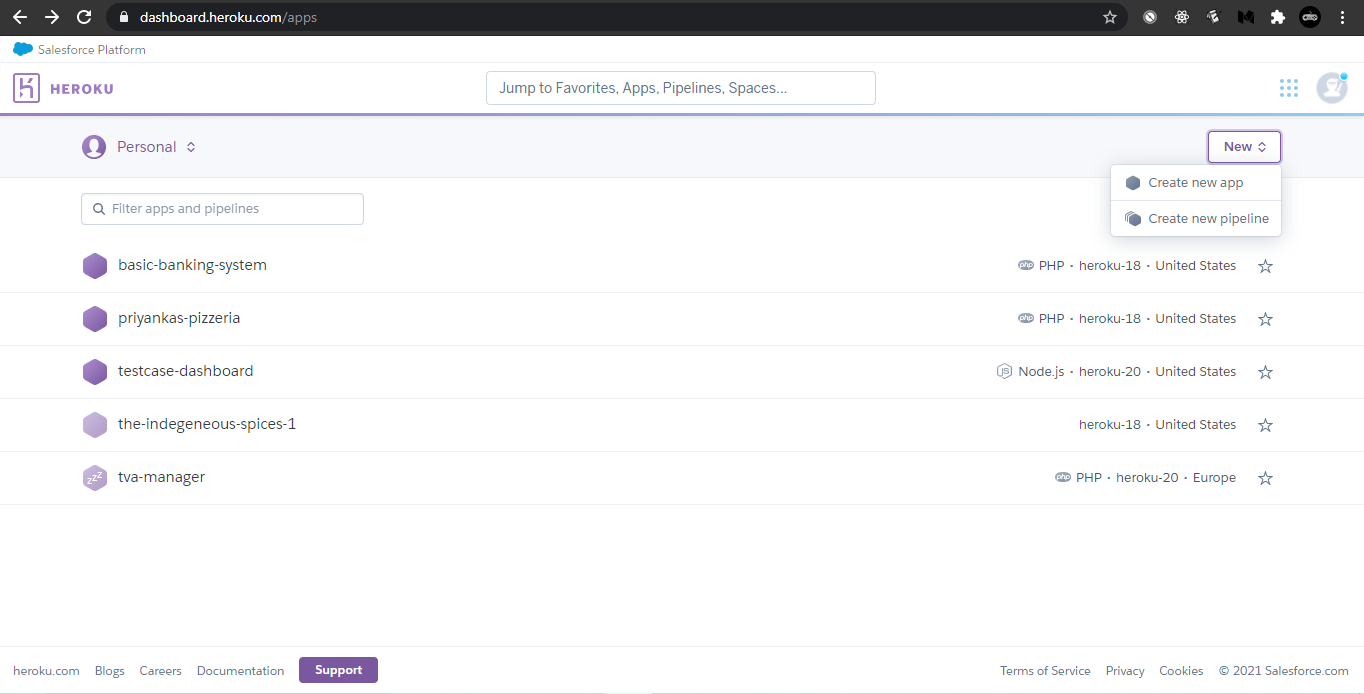
Once you successfully create a Heroku account, go to Heroku dashboard and create an app.
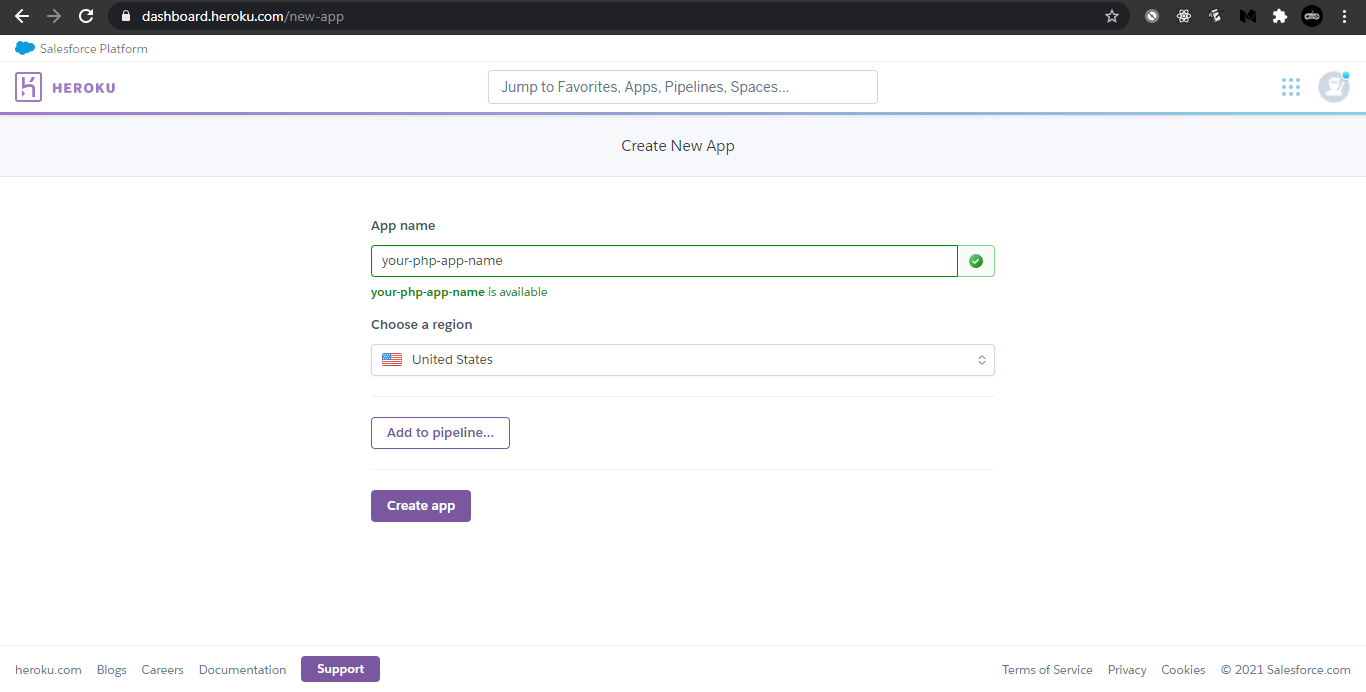
Give an app name of your choice. Don't forget to use lowercase letters only and no special characters other than dashes. ('-')
Select either US or Europe as the region. No issues with either of the locations.
Now click on 'create app'.
One more thing: Select 'PHP' build pack. It is important for Heroku to understand that you are using PHP for you web application. This is where Buildpacks come into action!
Go to 'settings' in Dashboard. Scroll down, you will notice Buildpacks.
Select PHP buildpack since we are using PHP to develop our current app.
You have successfully created an app instance in Heroku.
Now let us move to Github and look at how you can deploy your code.
2. Create a GitHub repository
If you already have a Github account, go ahead and create a github repository and deploy your code.
If you don't have a Github account, Create a GitHub account now!
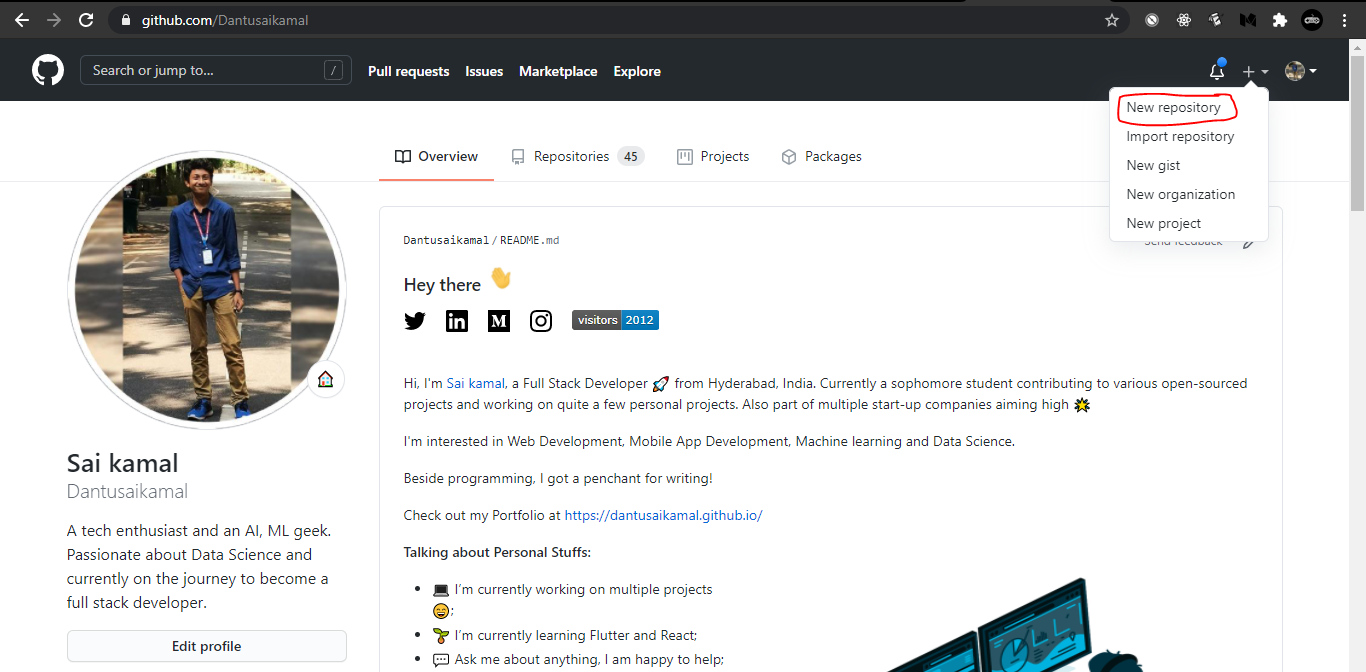
Once you have created a new account, click on '+' in the top right menu.
Select 'New repository'
Give a name to your app and finish creating the repository
Once you finish creating a repository, Push your code to your repository.
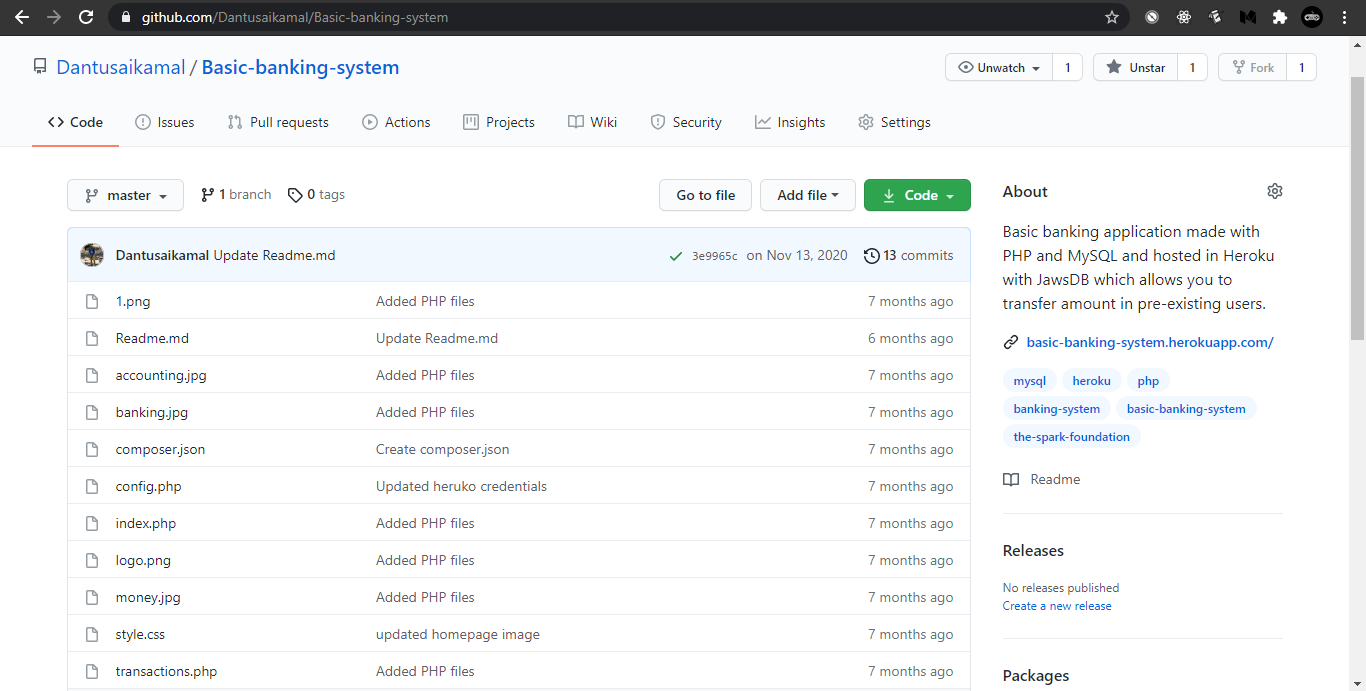
If you are done with everything, you repository should look like mine. You have just pushed code to Github. It's time to deploy your code to Heroku
Heroku easily connects with Github repositories and makes deploying code a piece of cake 🍰
Go back to Heroku Dashboard. Click on 'deploy' in the menu.
Now select 'GitHub' and connect with your Github account. Select your GitHub repository in which your pushed your code.
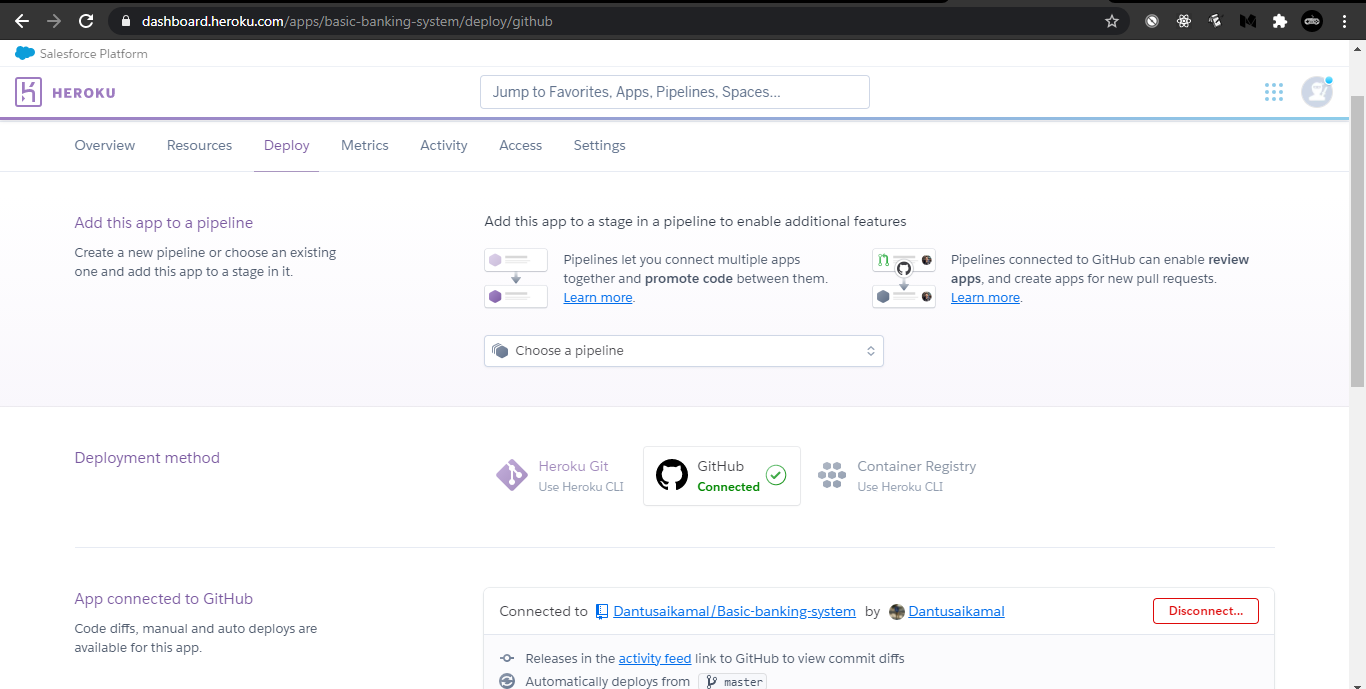
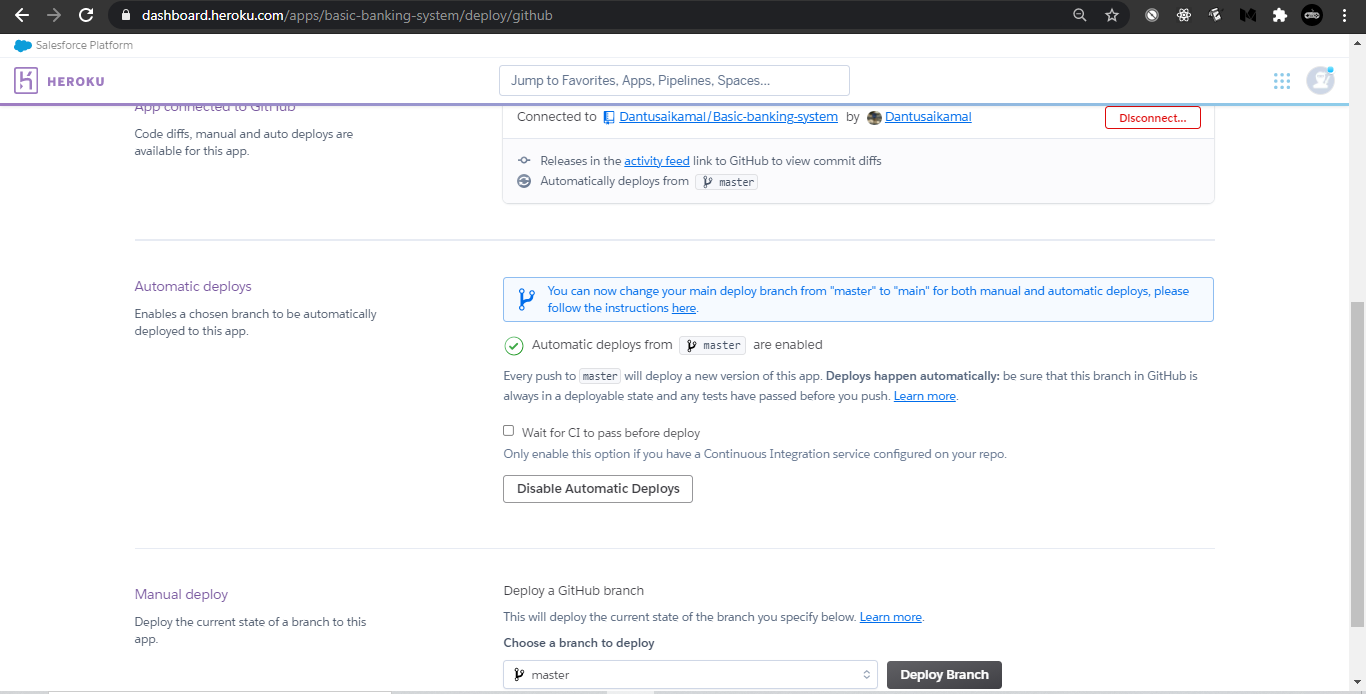
If you have followed the above steps, Your deployment page should look like this. Congratulations! You've successfully deployed your code in Heroku. Three more steps and you are done!
3. Configure Heroku build pack
Now that you have finished deploying code to Heroku, Let us configure the build pack in Heroku.
Note: This should be done automatically most of the time by Heroku itself. But just to make sure, we'll check if the build pack is rightly configured.
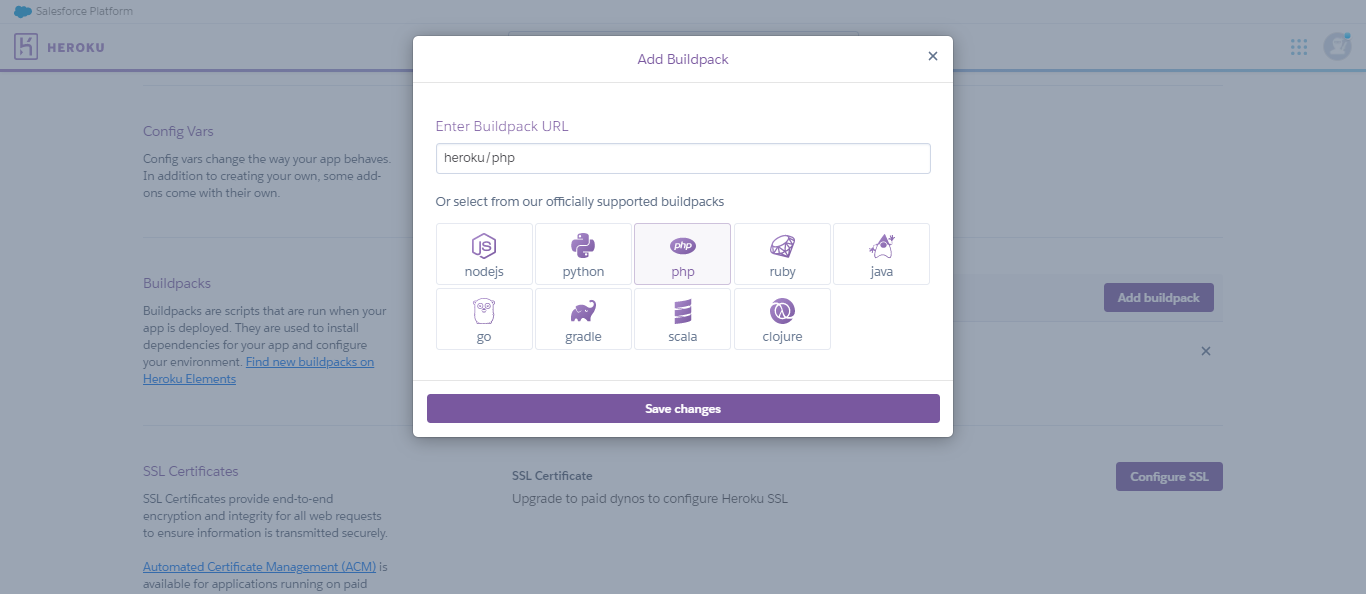
Go to settings page in your Dashboard.
Scroll down, you will find add buildpack option.
Click on 'add buildpack' and select PHP. Now click on 'Save Changes'.
If you don't have a database in your PHP website your work is pretty much done. Click on 'Open App' in Overview page in Dashboard to view your application!
But most of our PHP apps are dynamic applications with a database. So if you have one, follow the following steps.
4. Configure MySQL Database
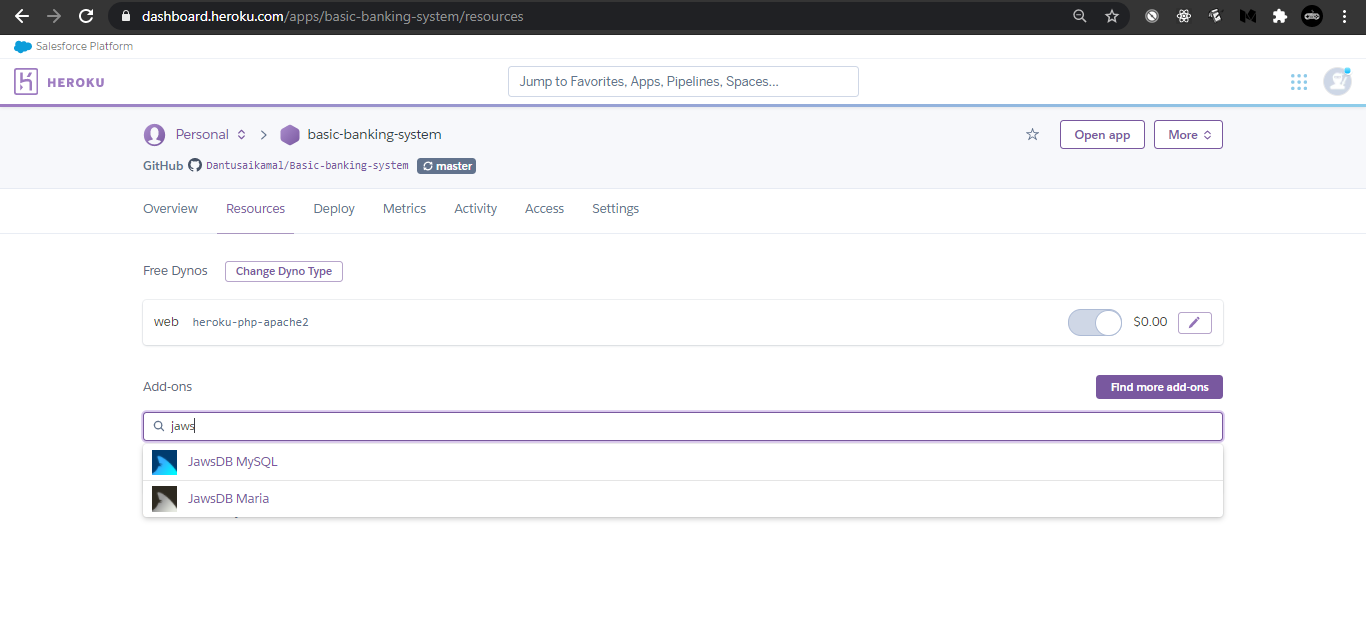
If you have a MySQL database in your local, create a MySQL add-on in Heroku. To do this, go to Resources tab in Dashboard.
Click on search bar and search for 'JawsDB MySQL'
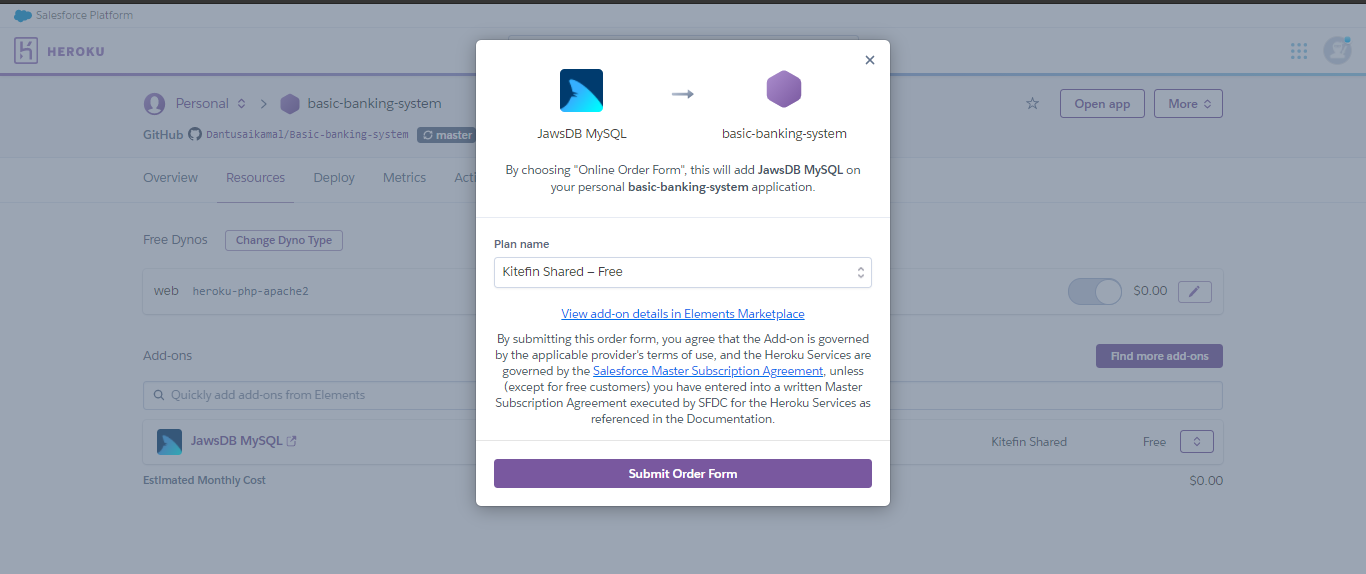
JawsDB is not a free instance for now. So you need to verify your Heroku account.
To verify your Heroku account:
1. Go to your Account 'Settings' in the Heroku Dashboard.
2. Click the 'Billing' tab.
3. Click 'Add Credit Card'
Note that you won't be charged any money since JawsDB is a free instance. But you would need a verified account in order to use add-ons.
Once you are done with verification, go to resouces and click on 'JawsDB MySQL' add-on you just added.
You will be taken to this page where your configuration details are visible.
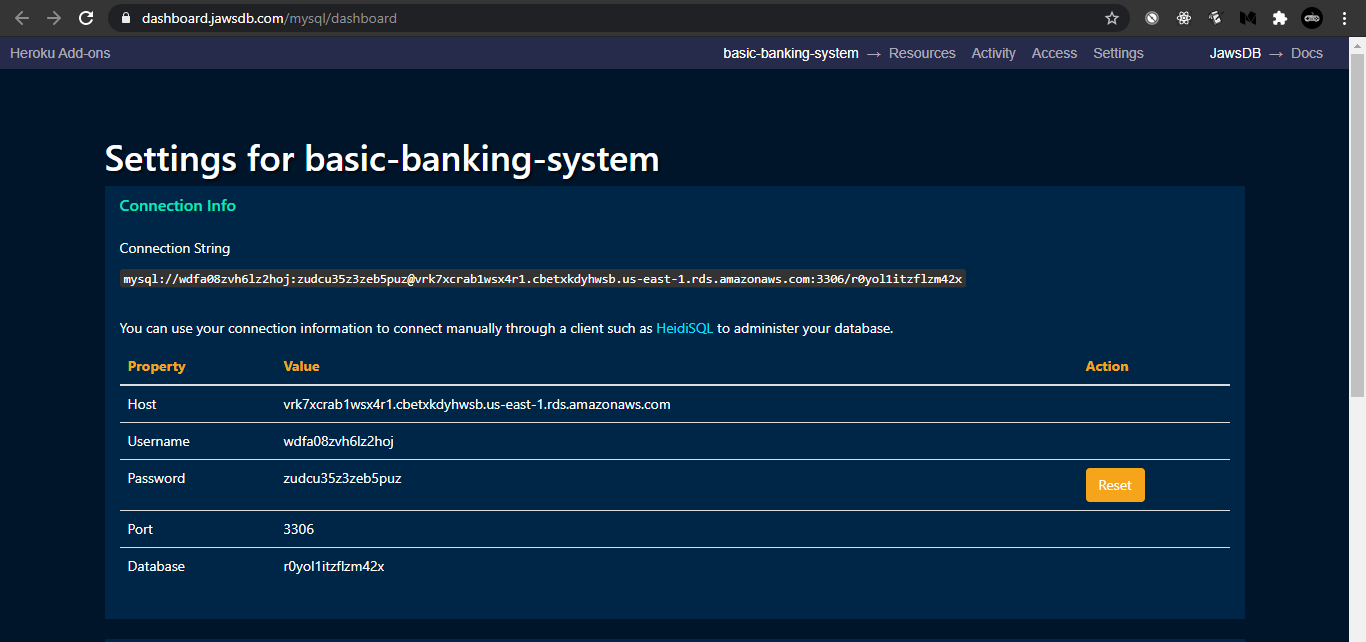
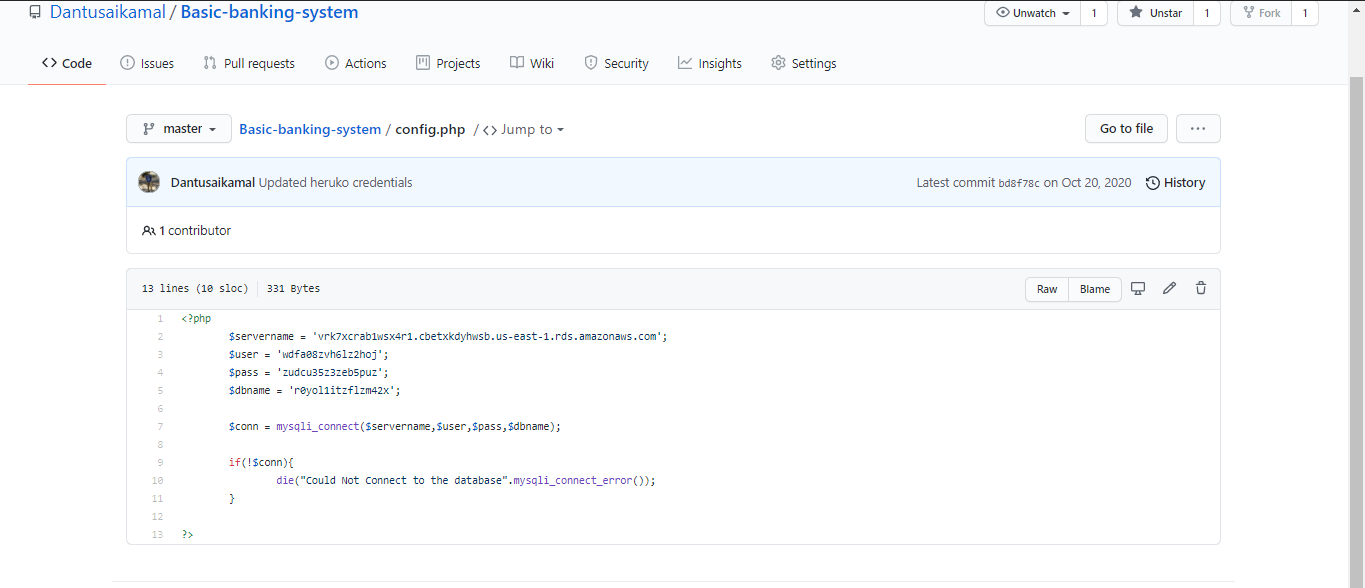
Now go back to GitHub and update your config.php file. Copy the Host, Username, Password, Port and Database details from JawsDB to your config.php.
Once you are done, your config.php file will look like this:
If you have any doubt what you just did, don't get lost. You just created a new MySQL database and connected it your app. But here's the problem: The database you just created is empty! Let's migrate your Local MySQL database to JawsDB using MySQL Workbench and Phpmyadmin
5. Exporting Database using Phpmyadmin and MySQL Workbench
We're almost there. This is the last step you need to follow to get your PHP app up and running with your database.
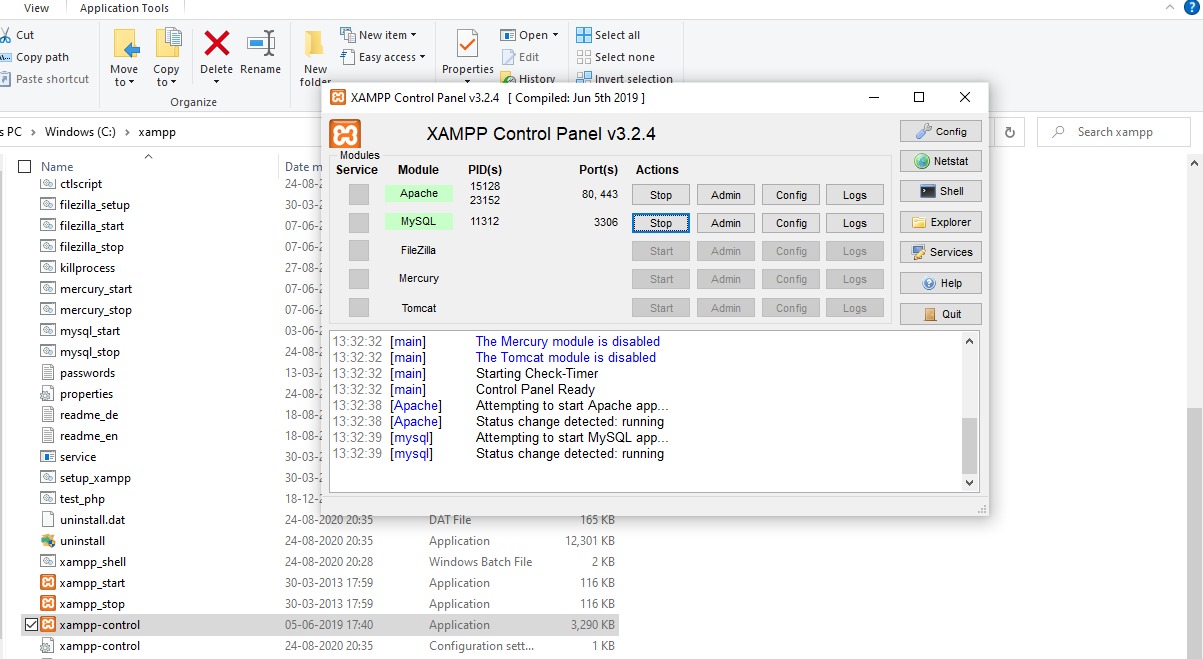
Go to XAMPP control panel and start 'Apache' and 'MySQL' modules.
Now open a browser and go to localhost/phpmyadmin web page. You will find your local database here. Click on your database and select 'Export' tab. In export tab, click on 'Go'.

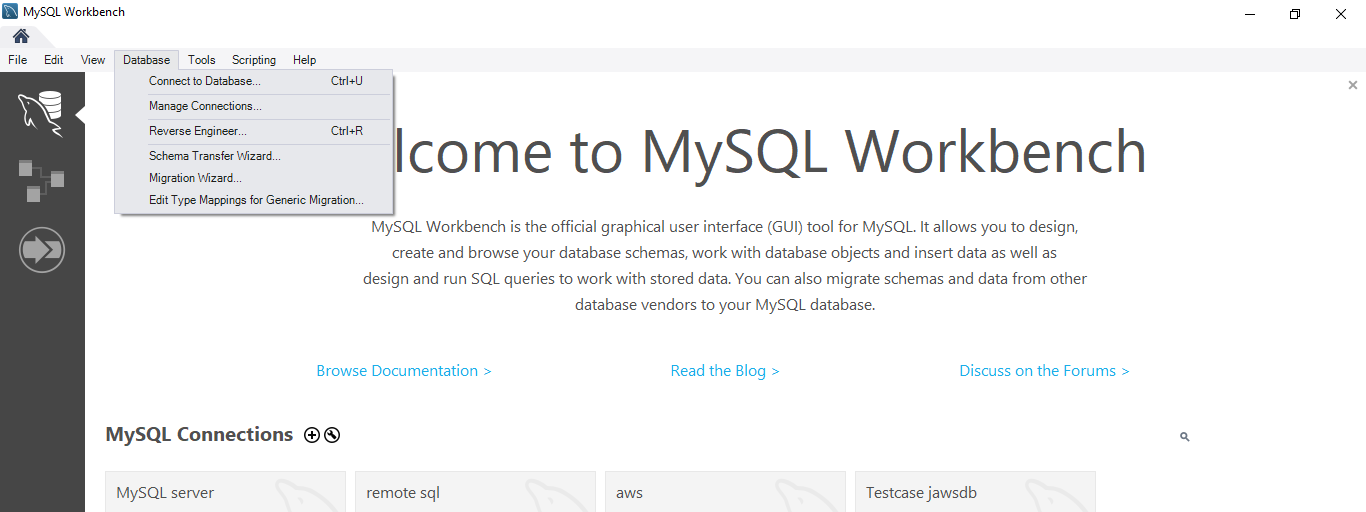
An SQL file will be downloaded. Now open MySQL Workbench. We need to Import the SQL file into your JawsDB MySQL database.
To do this, click on 'Database' tab in the menu. Click on 'Connect to Database'
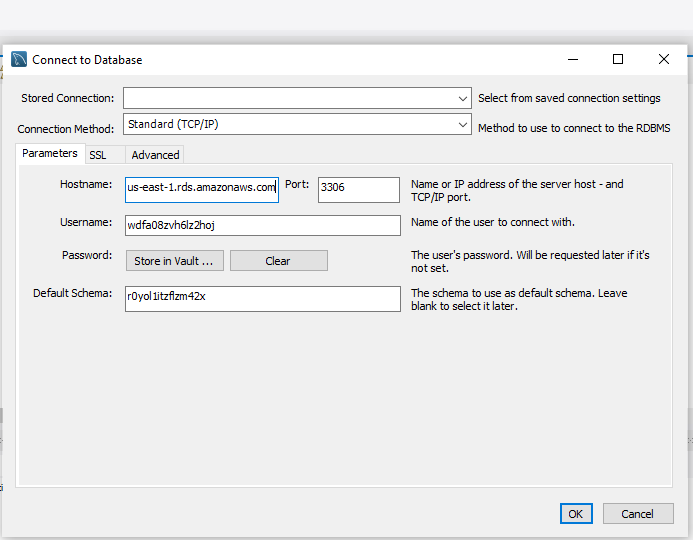
Now enter all the details of your JawsDB instance which you have copied and pasted in your config.php file earlier. Fill in all the details and click on 'OK' (Don't forget to enter the password in 'Store in vault' option)
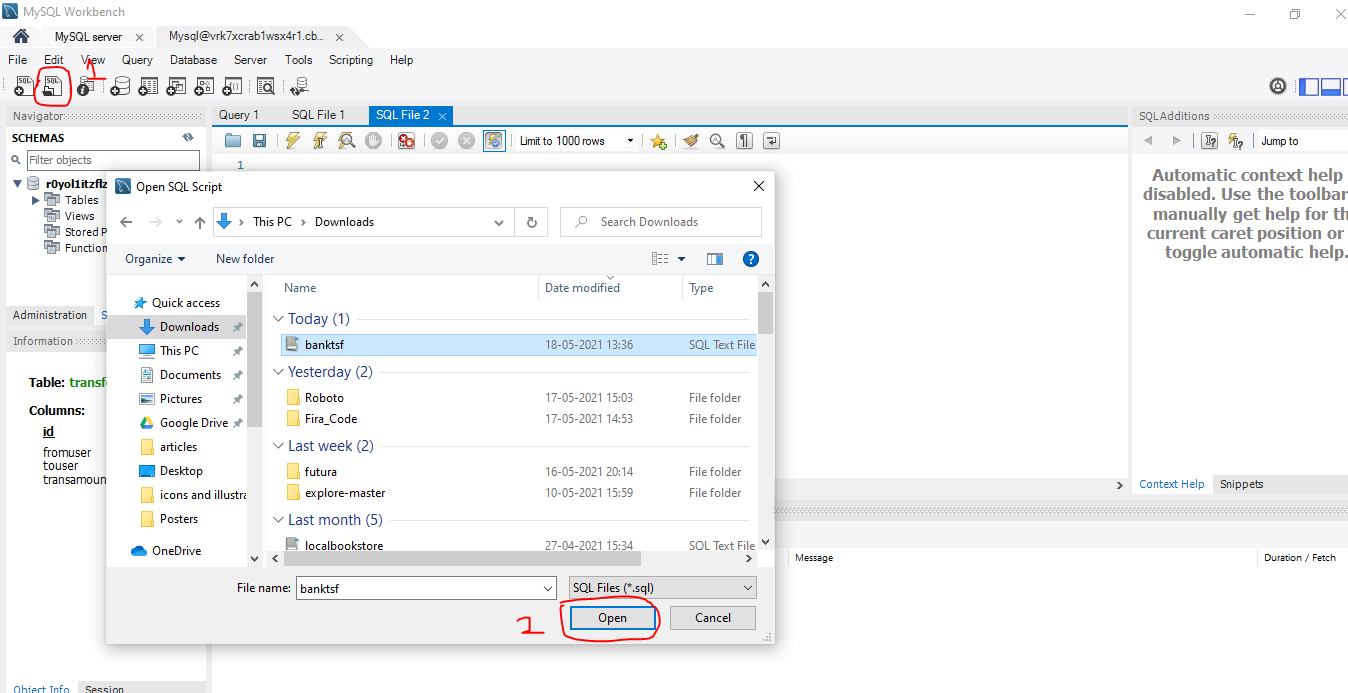
Now once you are successfully connected to your database, click on 'import button' in the menu.
Now open the SQL file you just downloaded from Phpmyadmin. This will copy all your queries to your new Database.
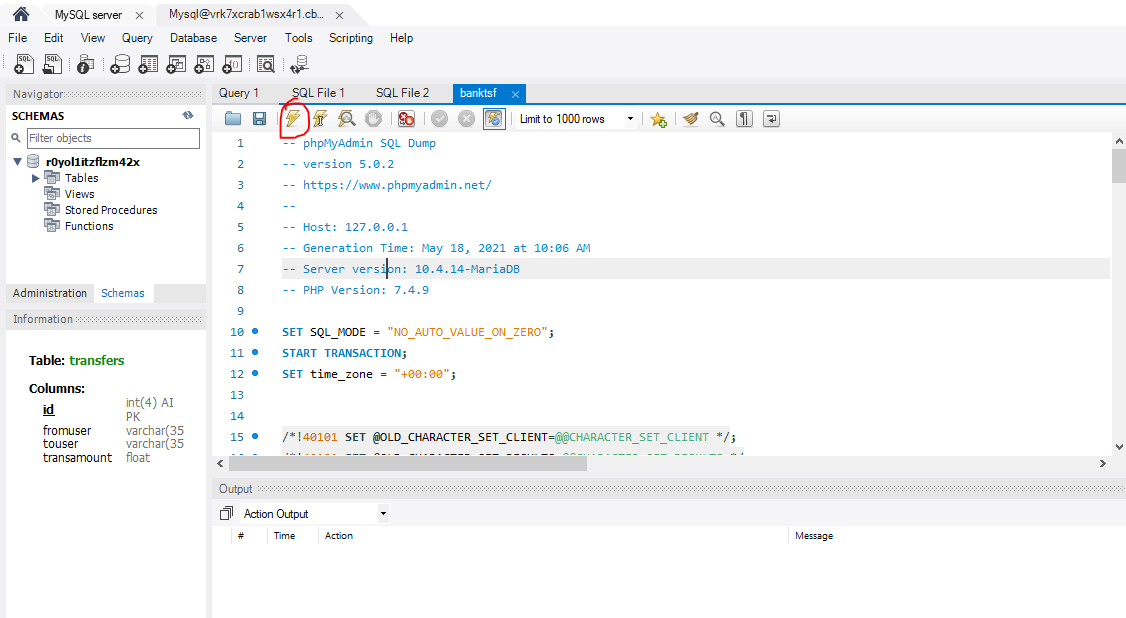
You just need to run the queries now to migrate your database. Click on the Flash button to run all the queries.
Once you are done, verify the rows are copied into your new database. This can be easily done. Right click on your table and click on 'Select Rows - LIMIT 1000'.
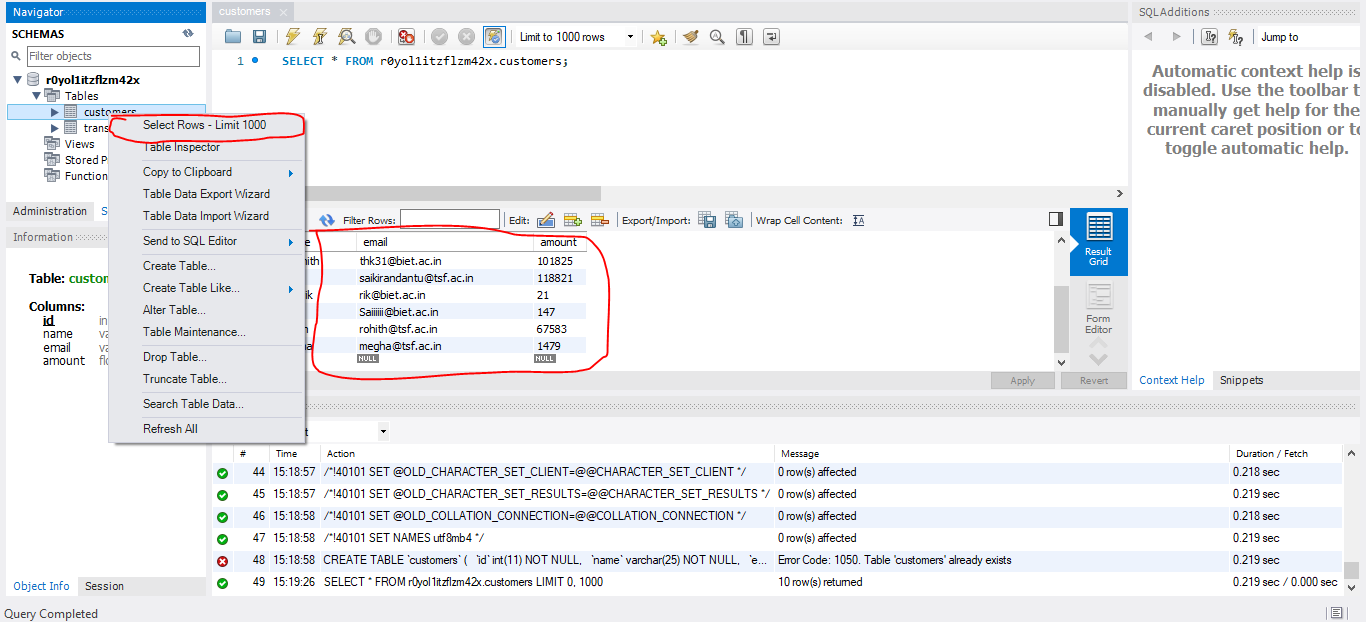
If you can see all the data from your local database, Congratulations! You made it! 🎉🥳
Now go to your Heroku Dashboard and click on 'Overview' tab. In top right, there is a 'Open App' button. Click on it to check our your application up and running!
Bottomline:
If you have actually spent more than 15 minutes. don't worry. The next time you deploy your application, you will hardly take 10 minutes.
Mail us if you have any queries in deploying your application to Heroku. We'll do our best to help you out.
Keep following the blog for more amazing articles! 🌟